
12.16.2010
The Studio
So this is the studio after about 4 months of work. Here we've got a homemade worktable, vacuum press for printwork, one-color t-shirt press, drying cabinet, light table/desk, washout booth, screen rack, and storebought print drying rack and exposure unit. I'll post more in-depth shots of everything with building plans when I get a chance. I'm not doing a damn thing til after the holidays.


Published Work
About a week ago Brett and I received an email through the shop from a UK publisher about having some of our work featured in a new book called The Little Book of Screenprinting, or something to that effect. One of the pieces he chose was the first print made available for sale over a year ago, so with a revamped design we chose to reprint this edition at a larger size to give him something more indicative of the quality of work being printed lately. This edition was 4 colors (two halftone textures, pink and dark grey), is about 19"x 23" in size and should be available for sale soon.


10.25.2010
Travel Posters
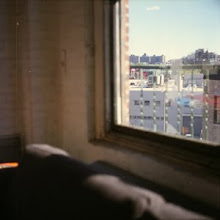
Inspired by turn-of-the-century travel posters popular among railroad companies and travel agencies, these designs were derived from photos taken over the summer with an old Canon F-1. Photos of the actual prints will be taken when I get my paws on a digital SLR, but they came out pretty close to these original mockups. They'll be signed, numbered and up for sale soon.


10.24.2010
Making Film Positives w/ Oil
Film positives are opaque images printed, painted or drawn onto transparent or translucent materials which are used to make stencils in screenprinting. Here's a quick tutorial on how to make cheap film positives by rubbing regular laser print outs from a copy store with vegetable oil. Printing onto acetate or mylar can be expensive if you can't do it yourself (Standard Screen Supply charges $15/sq ft), so this can be an inexpensive and fairly effective alternative.
For awhile I was using coated acetate sheets that absorb inkjet printing for my positives, but since most consumer-level printers only go up to 13"x 19", any image larger than that would require tiling the sheets, which is a difficult and time-consuming thing to do with photographic work.
So I made a trip to the Park Slope Copy Center on 7th avenue, which can laser-print b&w up to about 30"x 40", and got (4) 17"x 26" images printed for about $6.50 total. Rubbing bond paper with oil makes the paper translucent without degrading the printed image (with inkjet I'm not so sure) but just make sure that every inch of the paper is rubbed in in order to expose properly. I trimmed down the sheet shown in the video before exposing.
10.14.2010


10.13.2010
The Come Up
In mid-July I found a craigslist ad for a commercial space in South Williamsburg, went to take a look and signed the lease a few weeks later. Since then it's been all building, moving of equipment/supplies and prep-work. Took about two months to set everything up and now the space is a fully functional screenprinting studio for poster work and other flat substrates.
Here and there I'll be posting how-tos for building projects (vacuum presses, drying cabinets, etc.), printing techniques, photoshop tutorials and the little nuances I've come to learn the hard way. I'll also be posting my work from time to time. Man's gotta eat.


Subscribe to:
Posts (Atom)